To set consumption controls:
For fixed cost monitoring, set cost calculation and CO2 emission parameters.
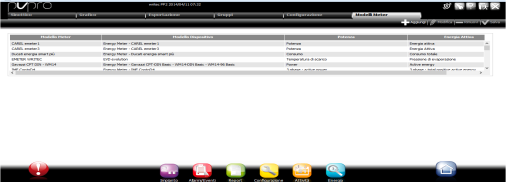
![]() Check for or create energy meters.
Check for or create energy meters.
In Meter Models, check whether energy meters are already listed: click ![]() to add a new meter, click
to add a new meter, click ![]() to edit an existent one or click
to edit an existent one or click ![]() delete it.
delete it.
To add a new meter model:
Enter the new model name in Meter Model.
Click Select.
Link a meter listed in Settings, Device model.
Select the power and energy variables listed in Variable.
Click Set to link them to the meter model.
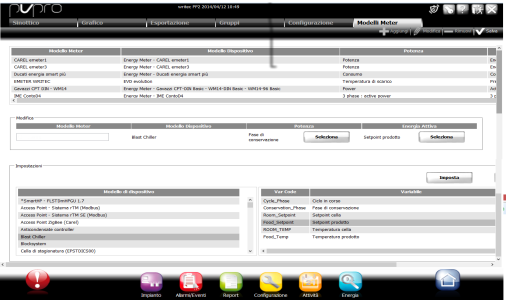
In the Settings page select Fixed Cost and set cost calculation and CO2 emission parameters.
Adding data for report headings and footers.


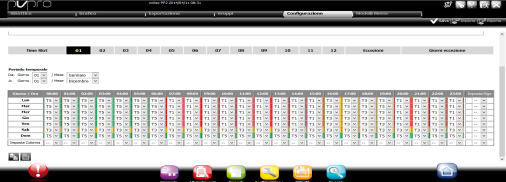
To set a cost category for an entire day, click Set row and select the cost category. To set a cost category for a single hour but for every day of the week, click Set column and select the cost category. To set a cost category on every day of the week, click on the bottom right.
To create time exceptions, double click Exceptions: a new week appears.
Click Exception days to select the days on which the exceptional week are applied.
|
|
To copy/paste one week's settings, click |
In Groups, enter the group name (i.e.: refrigerator counter) and tick the enable flag.
In Meter Model, select the meter model to be added to the group.
Use the arrows to add or delete meters to/from the group.
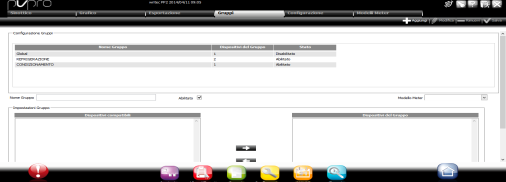
Click ![]() to add a group, click
to add a group, click ![]() to edit it or click
to edit it or click ![]() to delete it.
to delete it.
Click ![]() Save.
Save.
|
|
Replacing a meter requires a series of steps to save data read until the meter is replaced. |

|
During maintenance on utilities connected to a meter, we suggest you disable the entire group and not just the single meter. In fact, values read by a meter during maintenance could invalidate all group data. |
![]() See also
See also
PlantVisorPRO Locale 2.2.0 -
 to copy and click
  to paste.